Having access to the internet and living in the information age comes with great benefits. You can connect with people all around the globe. Location is not a limiting factor anymore. We can work and create together from wherever we are. We can find advice, help, and solutions to all sorts of problems on the internet. The positive effects are so overwhelming that life without it is unthinkable 40 years after the introduction of the internet.
In the last decade the popularity became a problem. The internet popped up on the radars of marketeers. Over time, they turned it into a data-sucking monster, and soon after governments jumped onto the bandwagon. Leaving us in today’s state, where websites are giant tracking pixels and network providers track every move you make.
This post will help you to get some of your privacy back. We will set up a private VPN with pritunl on a CentOS7 machine and hiding our network traffic from third parties.
Scenario
This scenario assumes the following:
- You have a public/private SSH key-pair
- You own a server
- The server runs on a clean CentOS7 install
- The server has a root and normal user
Boot the host and login as root.
Preparing the host
Before we can start, CentOS7 requires us to enable ethernet connectivity on the host machine.
nmcli c up eth0
This will only last for this session. To make it permanent we need to set ‘ONBOOT’ in /etc/sysconfig/network-scripts/ifcfg-eth0 to ‘YES’. Or use a CLI command:
nmcli c mod eth0 connection.autoconnect yes
Enable SSH login
As a good security measure, I urge you to permit server login only via SSH. You can read more about it and how to set it up here.
Follow the tutorial above and don’t forget to restart the SSH daemon. Now we are ready to prepare for the pritunl installation.
Installing pritunl and mongodb
We start with adding the pritunl repository to our yum repo list:
sudo tee /etc/yum.repos.d/pritunl.repo << EOF
[pritunl]
name=Pritunl Repository
baseurl=https://repo.pritunl.com/stable/yum/centos/7/
gpgcheck=1
enabled=1
EOF

sudo rpm -Uvh https://dl.fedoraproject.org/pub/epel/epel-release-latest-7.noarch.rpm
gpg --keyserver hkp://keyserver.ubuntu.com --recv-keys 7568D9BB55FF9E5287D586017AE645C0CF8E292A
gpg --armor --export 7568D9BB55FF9E5287D586017AE645C0CF8E292A > key.tmp; sudo rpm --import key.tmp; rm -f key.tmpbash
Pritunl relies on mongodb to handle data. To install mongodb we need to add this repository as well:
sudo tee /etc/yum.repos.d/mongodb-org-5.0.repo << EOF
[mongodb-org-5.0]
name=MongoDB Repository
baseurl=https://repo.mongodb.org/yum/redhat/$releasever/mongodb-org/5.0/x86_64/
gpgcheck=1
enabled=1
gpgkey=https://www.mongodb.org/static/pgp/server-5.0.asc
EOF
With that in place we can start installing our dependencies:
sudo yum -y install pritunl mongodb-org
Start and secure mongodb
Enabling mongodb is straightforward. Enable the service with sudo systemctl enable mongod. Then start it via sudo systemctl start mongod.
The crucial part is to add some additional security to the mongodb instance.
Creating an admin account is an easy first step:
# connect to the service via mongo
mongo
# ---> now you are in the REPL
use admin;
# replace <PASSWORD>
# bonus points for replacing admin as username
db.createUser(
  {
    user: "admin",
    pwd: "<PASSWORD>",
    roles: [
      "userAdminAnyDatabase",
      "dbAdminAnyDatabase",
      "readWriteAnyDatabase"
    ]
  }
);
quit()
An existing admin account is good, but we need to tell mongodb to enforce authentication to get some benefits from that.
Open the config file using sudo nano /etc/mongod.conf and add the following lines:
security:
  authorization: enabled
Since we don’t want to let pritunl use our admin user, we will create a pritunl user:
# connect to the REPL as admin
mongo -u admin --authenticationDatabase admin
# ---> now you are in the REPL
use admin;
# replace <PASSWORD>
db.createUser({
  user: "pritunl",
  pwd: "<PASSWORD>",
  roles: [{role: "dbOwner", db: "pritunl"}]
});
quit()

# verify the credentials
mongo -u pritunl --authenticationDatabase admin pritunl
With a proper mongodb setup in place, we can start spinning pritunl up.
Start and configure pritunl
Enabling pritunl follows the same blueprint as the mongodb instance:
sudo systemctl enable pritunl
sudo systemctl start pritunl
If you expect a high load on your VPN server you can increase the open file limit:
sudo sh -c 'echo "* hard nofile 64000" >> /etc/security/limits.conf'
sudo sh -c 'echo "* soft nofile 64000" >> /etc/security/limits.conf'
sudo sh -c 'echo "root hard nofile 64000" >> /etc/security/limits.conf'
sudo sh -c 'echo "root soft nofile 64000" >> /etc/security/limits.conf'
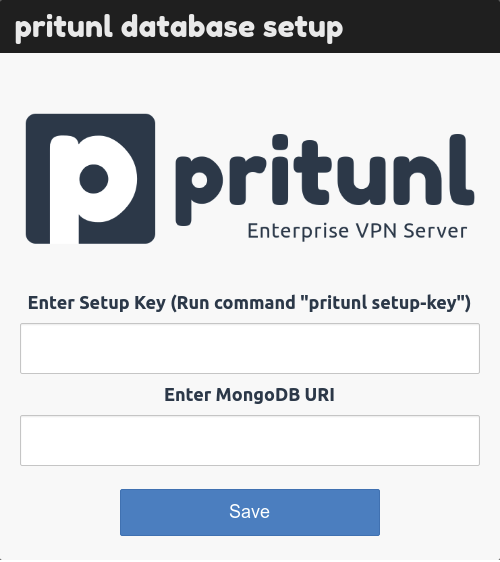
Before we can configure pritunl, we need a setup key. To obtain one, run pritunl setup-key.
No visit your server with a browser.

Fill in the setup key and the mongodb connection string similar to mongodb://pritunl:<PASSWORD>@<MONGOHOST>:<MONGOPORT>/pritunl?authSource=admin.
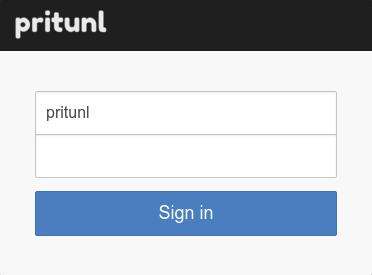
If everything worked out, you will see the login screen.

The default user is pritunl. You can get the default password via pritunl default-password.
After logging in, you can start configuring the VPN to your liking. Take note of the UDP Port pritunl runs on.
Adjusting the firewall for pritunl
With CentOS7 you have to jump some additional hoops to allow connections to your VPN.
First, create a new service description for the firewall daemon:
vi /etc/firewalld/services/pritunl.xml

<?xml version="1.0" encoding="utf-8"?>
<service>
  <short>pritunl</short>
  <description>pritunl open UDP port <YOUR UDP PORT> for client connections</description>
  <port protocol="udp" port="<YOUR UDP PORT>"/>
</service>
After that, check with ip addr on which tunnel interface pritunl is running. It looks like this:
20: tun0: <POINTOPOINT,MULTICAST,NOARP,UP,LOWER_UP> mtu 1500 qdisc pfifo_fast state UNKNOWN group default qlen 1000
    link/none
    inet 192.168.123.1/24 brd 192.168.123.255 scope global tun0
       valid_lft forever preferred_lft forever
    inet6 XXXX::XXXX:XXXX:XXXX:XXXX/64 scope link flags 800
       valid_lft forever preferred_lft forever
Now we need to add this information to the firewall and allow masquerading.
sudo firewall-cmd --zone=public --add-service=pritunl --permanent
sudo firewall-cmd --permanent --zone=public --add-masquerade
sudo firewall-cmd --zone=public --add-interface=tun0 --permanent
The last thing to do is to run echo 1 > /proc/sys/net/ipv4/ip_forward to allow IP forwarding.
Now you can revisit the web interface and start creating VPN users. You can find the official client here.
Congratulations, you did it. You own a private VPN now. Enjoy the extra privacy and stay safe out there.
Going one step further
You could improve the above example by:
- adding an SSL certificate to the VPN server
- registering a domain for your VPN server
Let me end this excursion with a quote for your meditation
Privacy is not something that I’m merely entitled to, it’s an absolute prerequisite. — Marlon Brando
